WooCommerce Integration Guide
Accept payments instantly on your WooCommerce store with our no-code payment gateway. We support all major payment methods, including:- UPI
- Credit Cards
- Debit Cards
- Net Banking
- Wallets
- Buy Now Pay Later (BNPL)
1. Sign up and set up
- Sign up with Cashfree if you don’t have an account.
- Submit the required documents.
2. Install the Cashfree payments plugin
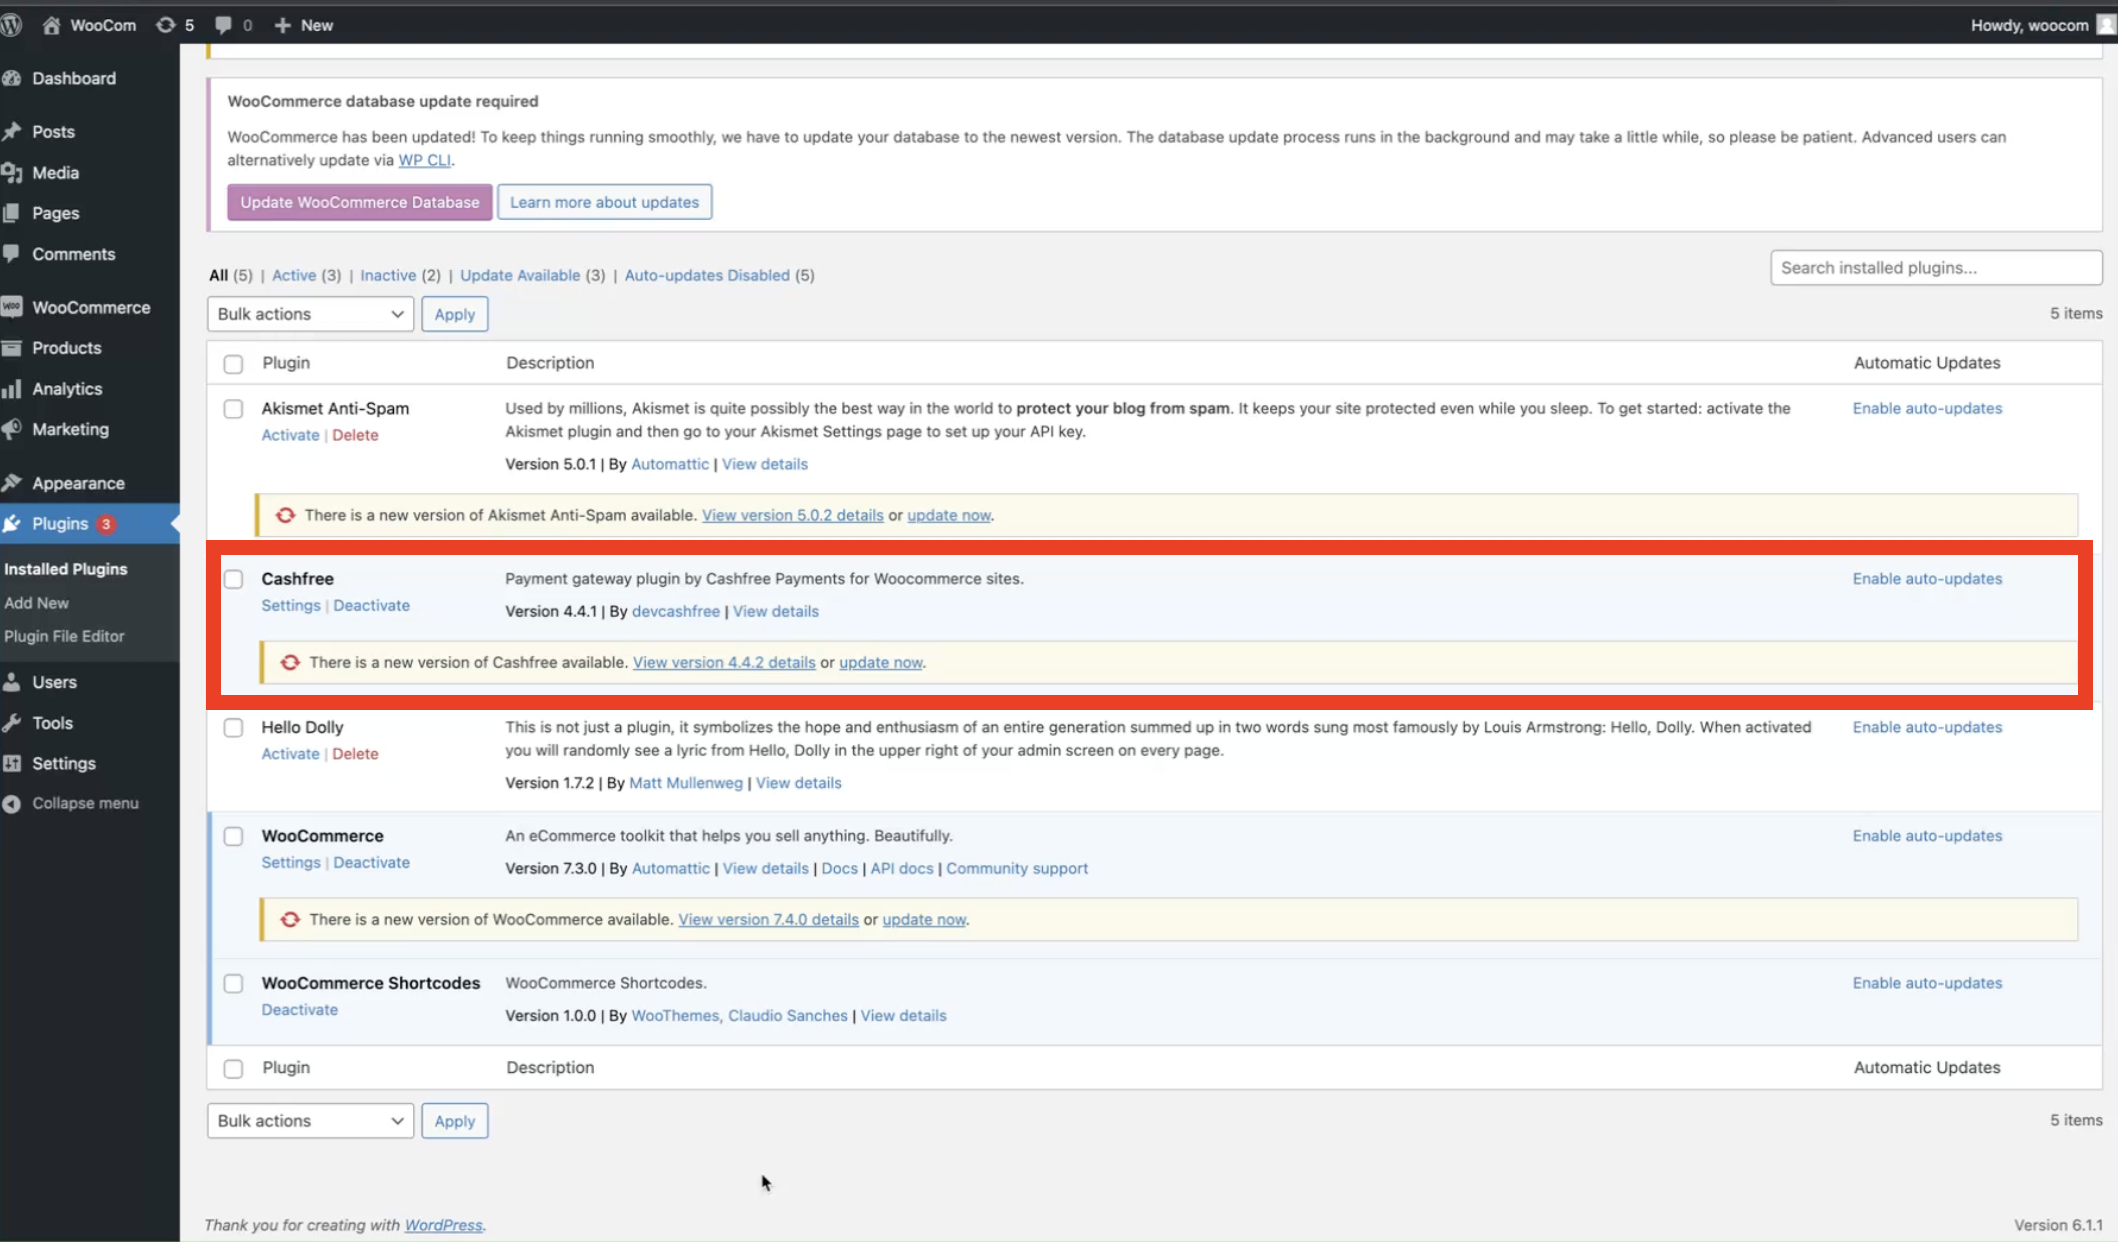
- Download the plugin from WordPress.
- Log in to your WordPress Admin Dashboard.
- Upload and install the plugin in
/wp-content/plugins. - Activate the Cashfree Plugin from the Plugins page.
3. Configure Cashfree in WooCommerce
- Go to WooCommerce > Settings > Checkout.
- Select Cashfree under Payment Gateways.
- Enable Cashfree by checking the Enable/Disable box.
4. Enter your credentials
- App ID and Secret Key from Cashfree:
- Enter your credentials in the Cashfree plugin settings.
- Optional settings:
- Sandbox Mode: Check to enable test mode.
- In-Context Payment: Check to avoid redirection during payment.
5. Whitelist your domain
To complete the integration, request domain whitelisting:- Navigate to Developers > Whitelisting in the Cashfree Dashboard.
- Follow the whitelisting guide.
BNPL plus integration
1. Setup guide
- Upgrade Cashfree Plugin: Go to WooCommerce Admin > Plugins and update to the latest version.
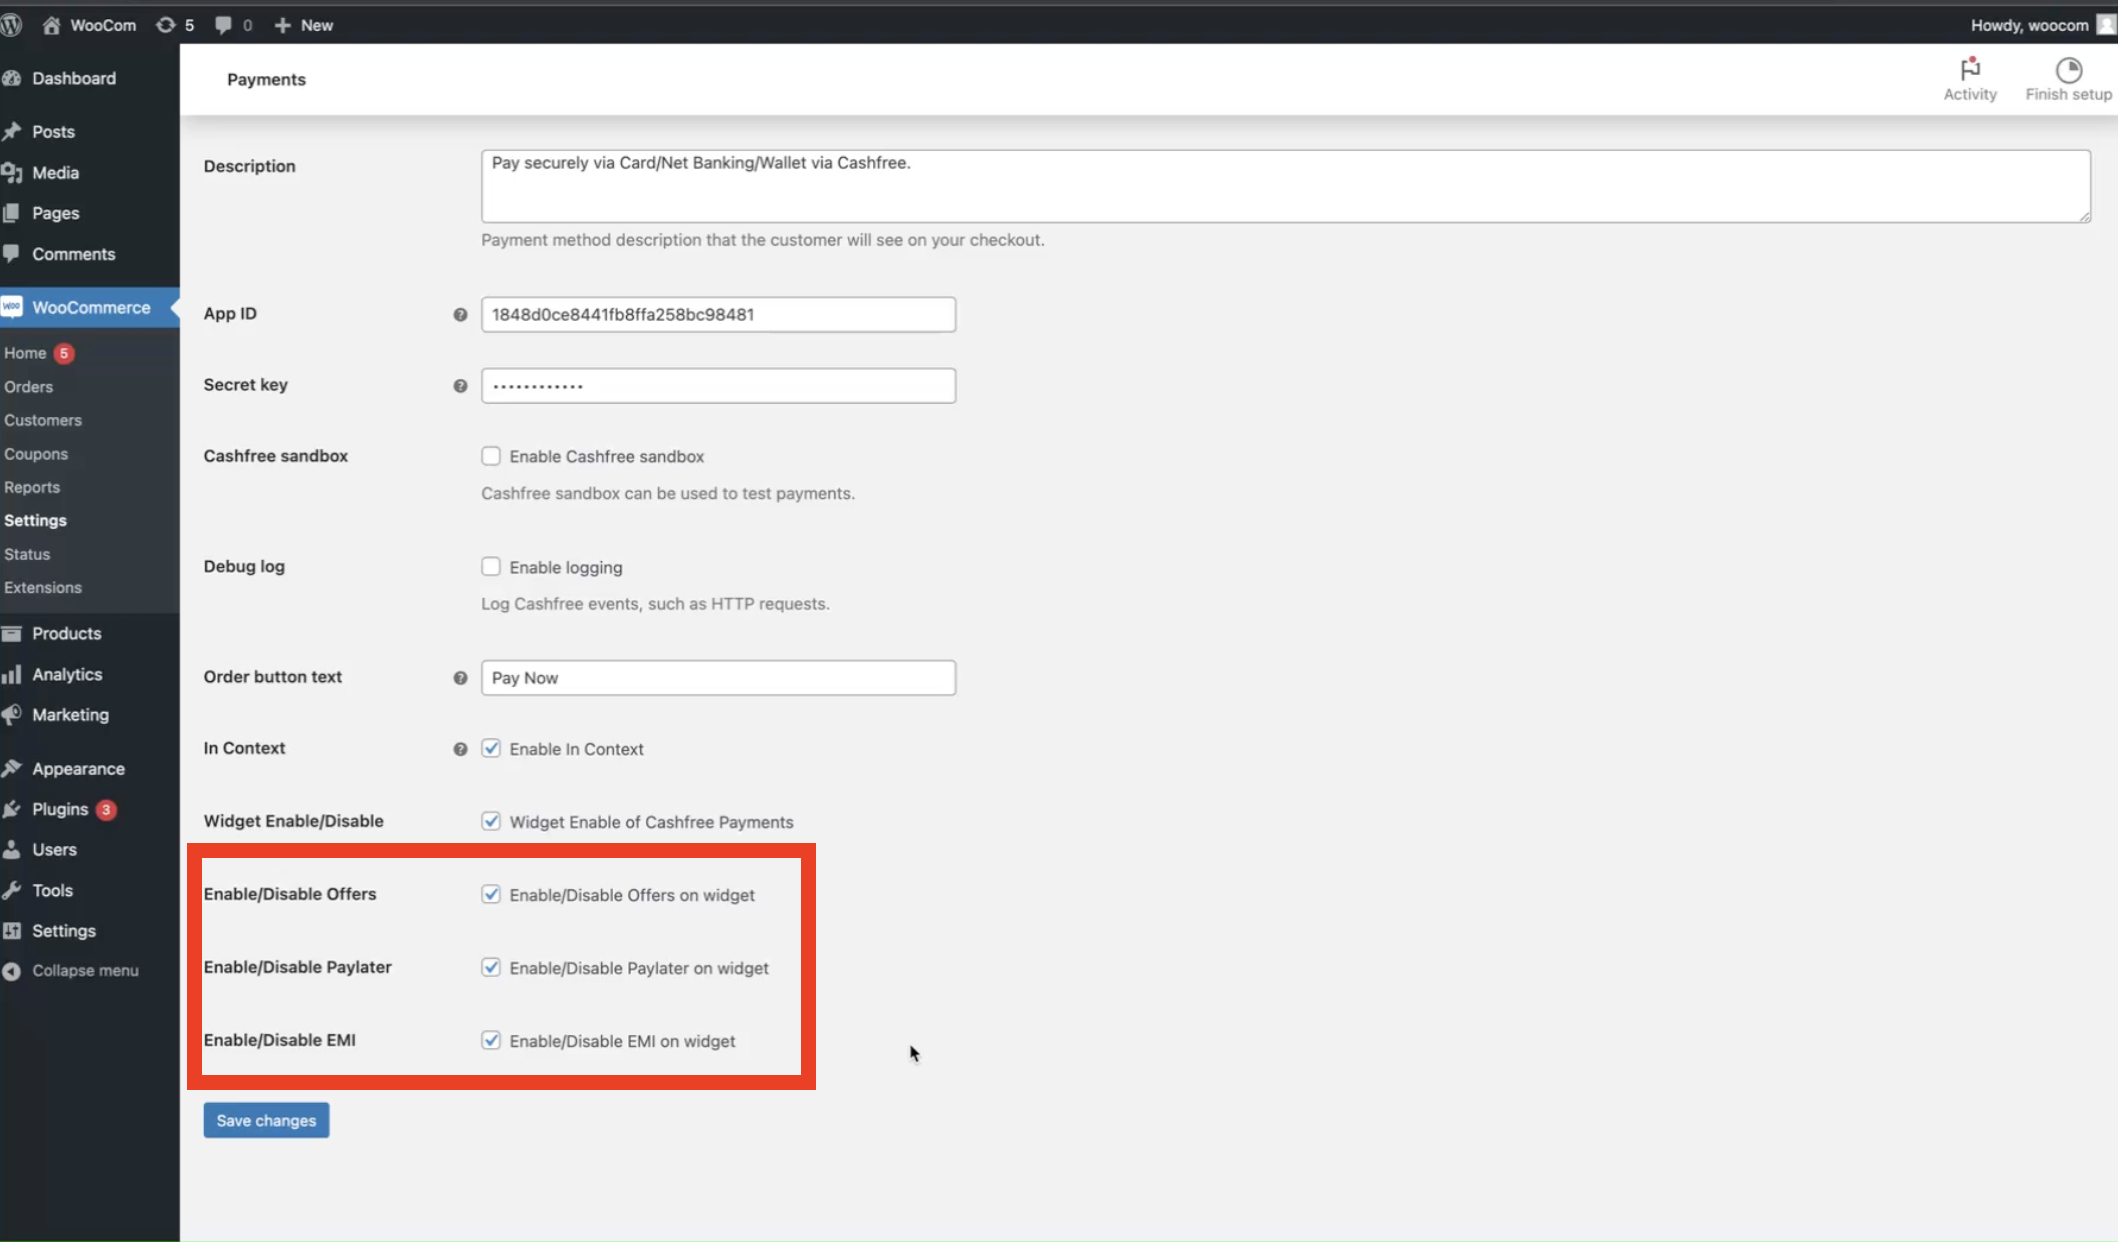
- Enable BNPL Options: Go to Settings and activate:
- Offers, pay later, or EMI options as desired.


Done! BNPL Plus will now display on your product pages.
2. Troubleshooting
Common Errors and Solutions- “Authentication Failed”: Ensure Sandbox Mode is disabled in settings.
- Domain Error: Verify the domain is whitelisted in the Cashfree Dashboard.
Learn how to use other features to improve conversion using offers and cart recovery.
Quick dev-to-dev talk
You clearly care about building better payment experiences for your clients, here’s a quick tip: Earn additional income doing exactly what you’re doing now!Join the Cashfree Affiliate Partner Program and get rewarded every time your clients use Cashfree.What’s in it for you?- Earn up to 0.25% commission on every transaction
- Be more than a dev - be the trusted fintech partner for your clients
- Get a dedicated partner manager, your go-to expert
- Instant activation, go live in minutes.
- Industry-best success rate across all payment modes.
- Effortlessly accept international payments in 140+ currencies